Navigate to Schedule
From the main navigation, click on Schedule and then select Create Schedule Manually. This opens the schedule management panel where you can view and manage all generated schedules.

Choose Department and Week
Use the dropdown menus to select the Department and the Week you wish to review. Only weeks that have requirements entered will appear in the week selector. If a week is missing, ensure that shift requirements have been added for that period before proceeding.
Review the Generated Schedule
The system will display the auto-generated schedule for the selected department and week. At this stage, the schedule is in draft mode — it is not yet visible to staff members. Take time to review shift assignments and ensure everything looks correct before publishing.

Manually Filling and Publishing the Schedule
After selecting your department and week, the schedule grid is displayed showing all required shifts for each day. This article walks you through assigning staff to open shifts and publishing the final schedule.
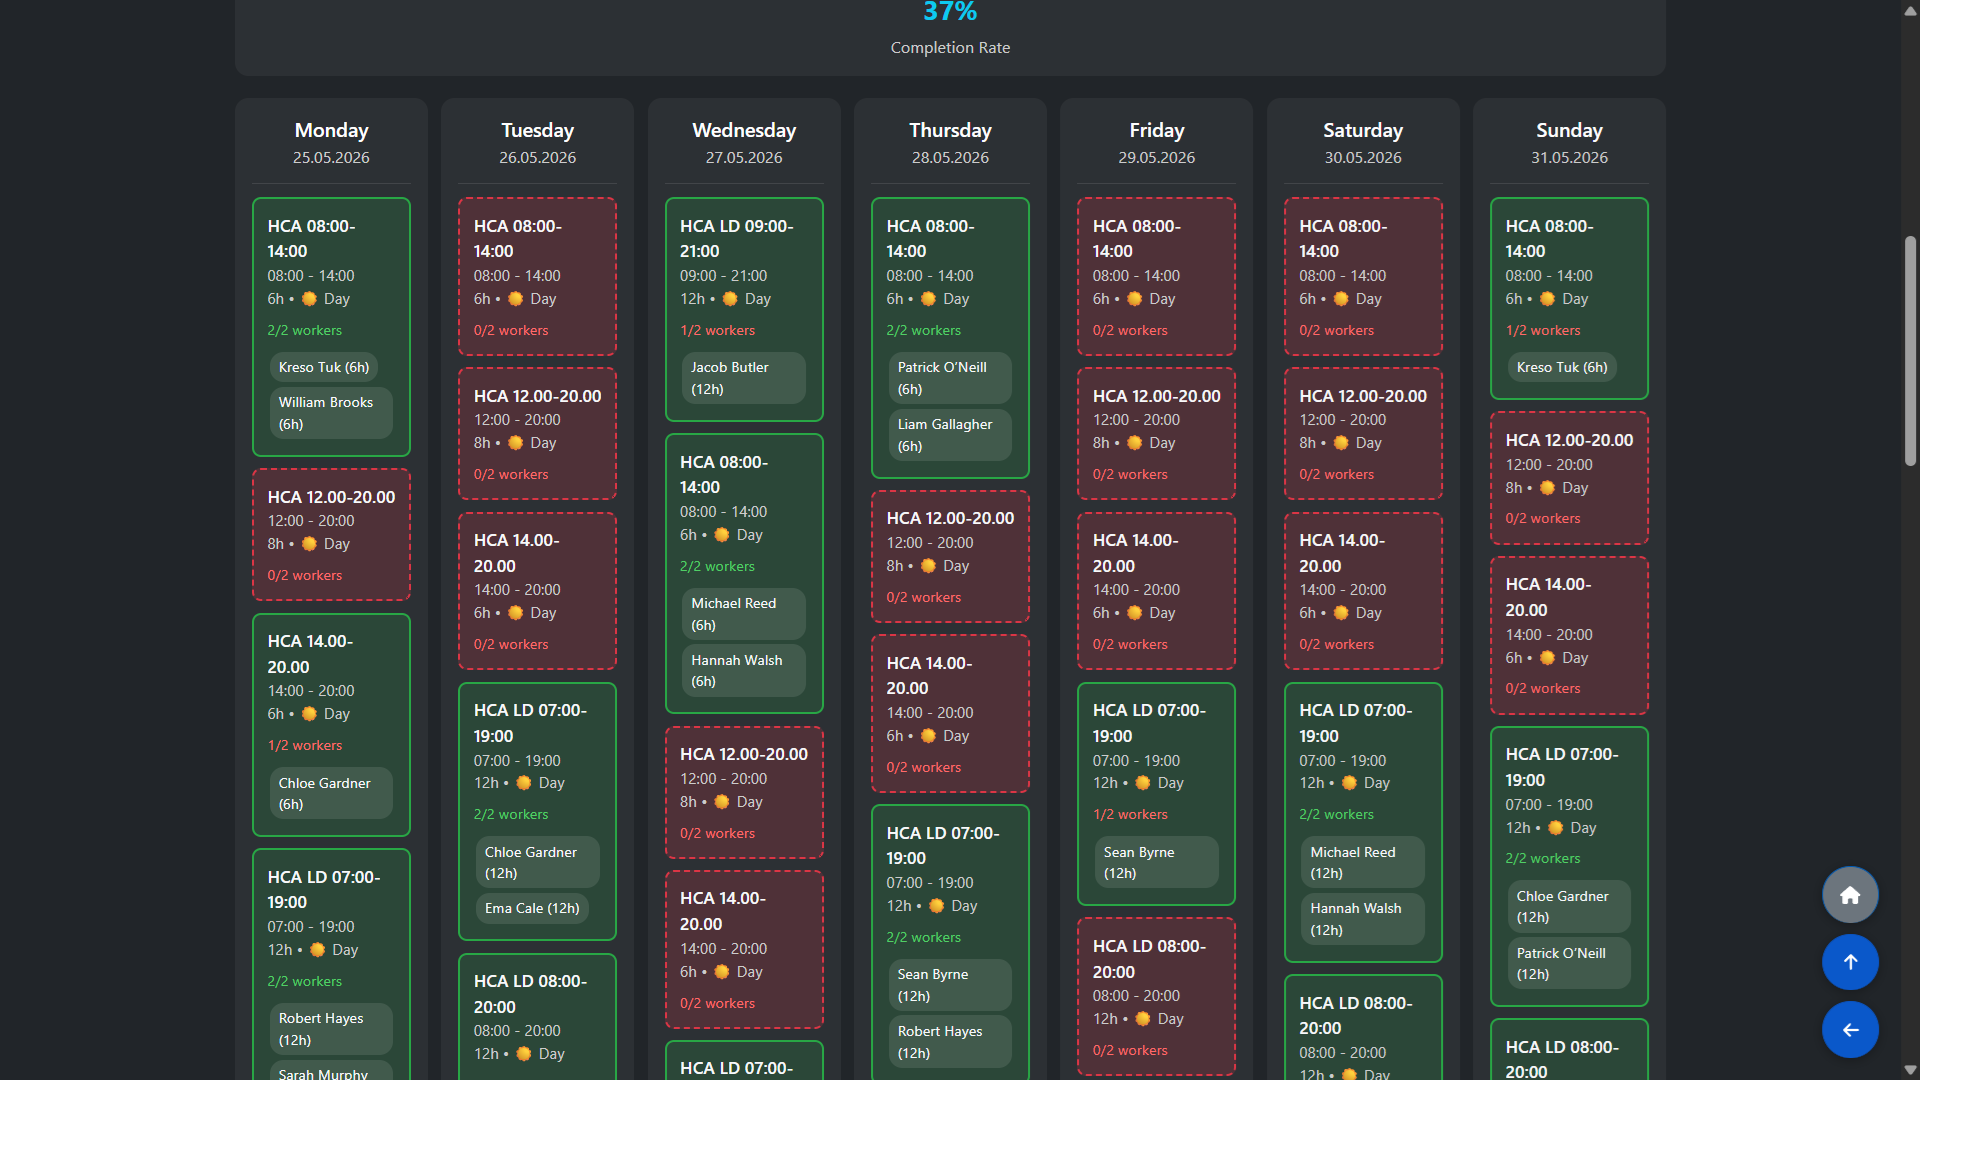
Reading the Shift Grid
The weekly schedule is displayed as a grid with one column per day. Each shift slot is shown as a coloured card:
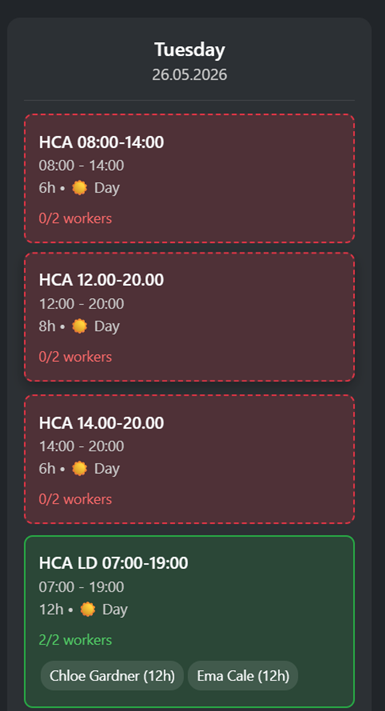
Red card (dashed border) — this shift is not yet fully staffed and requires attention.
Green card — this shift is fully covered with the required number of workers.
Each card shows the shift type, time, duration, shift category (Day/Night), and the current staffing status (e.g. 0/2 workers or 2/2 workers). Work through the red cards until all shifts turn green.
Clicking a Shift to Assign Staff
Click on any red shift card to open the Assign Employee panel. The panel shows the shift details (name, day, date and time) along with a list of eligible employees. Only employees who meet all of the following conditions are shown:
Qualified for the shift type
Available on that day of the week (based on their contract settings)
Not on holiday or an approved leave request (sick day, day off, etc.)
Did not work a night shift the previous day
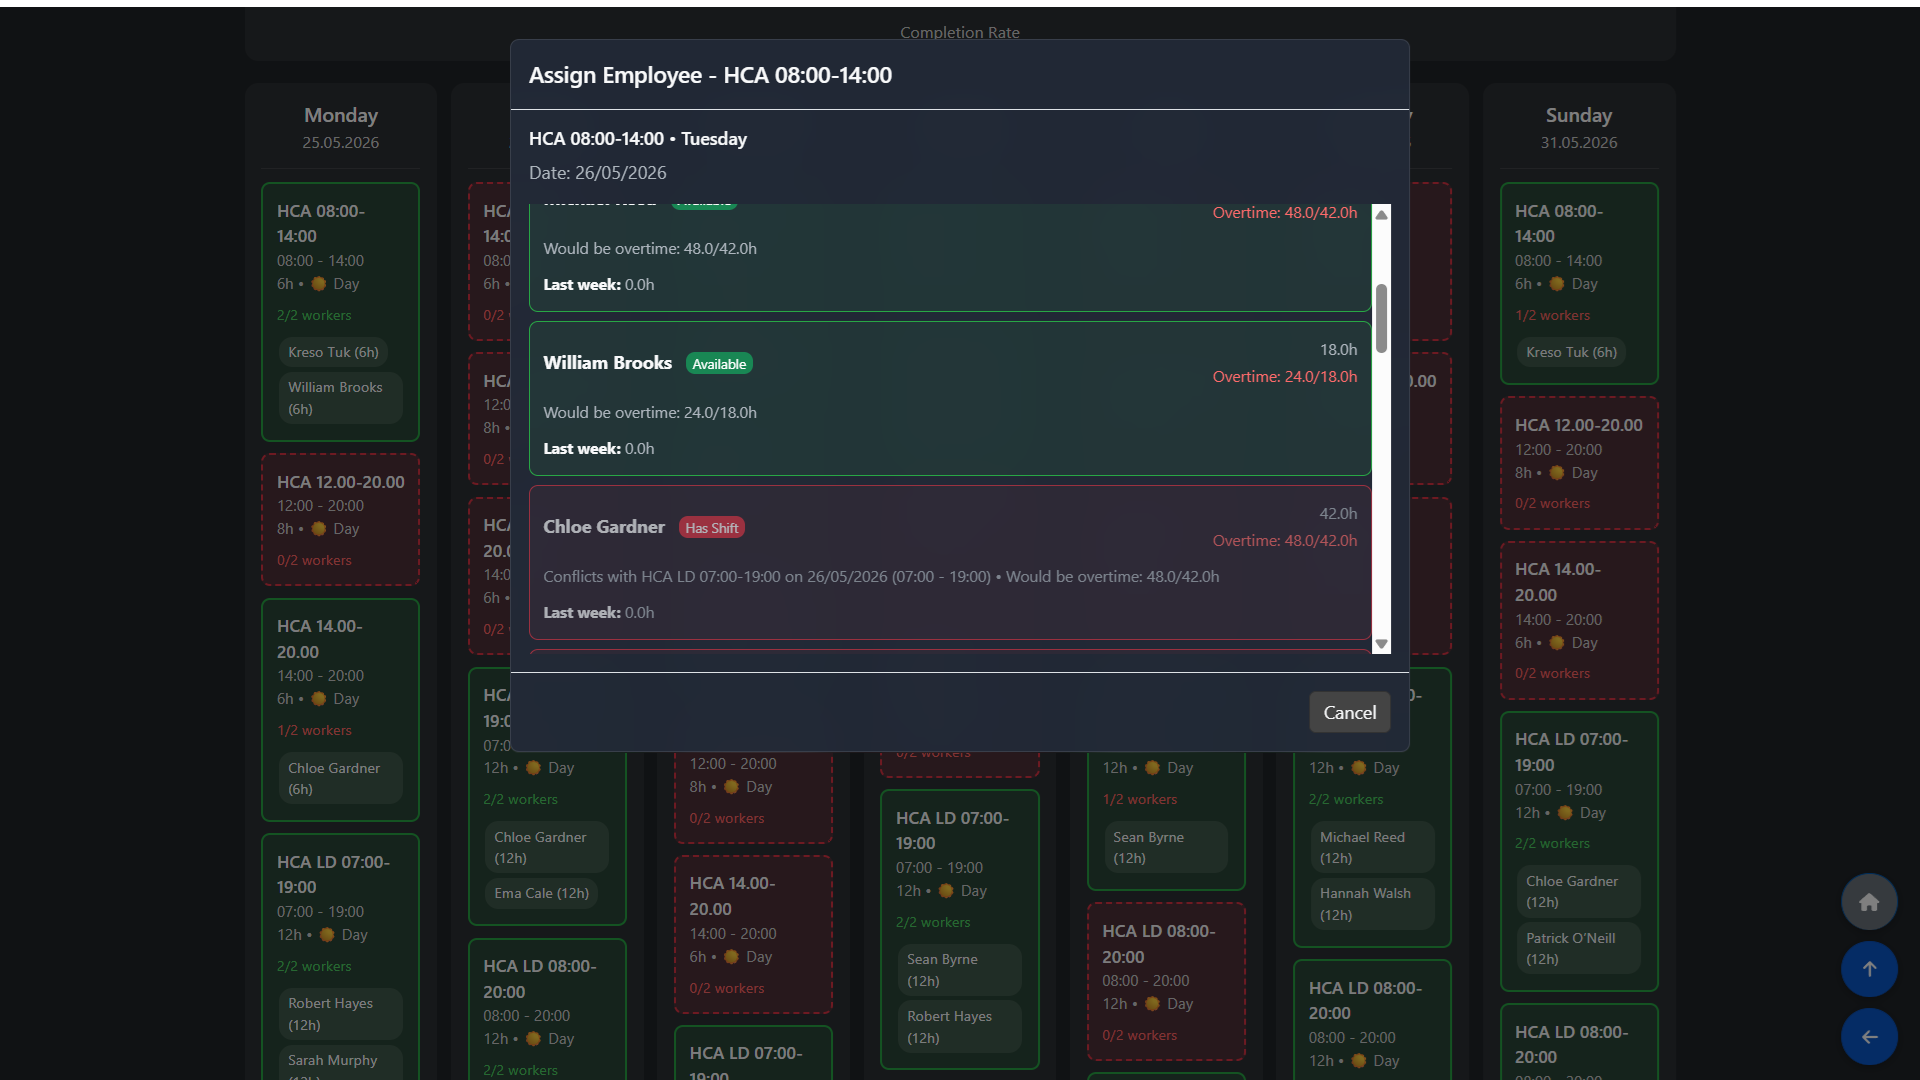
Understanding Employee Availability
Each employee in the list shows:
Current weekly hours — the total hours already assigned to them this week.
Overtime indicator — if assigning this shift would exceed their contracted weekly maximum, the system displays their projected hours in orange (e.g. Overtime: 48.0/42.0h). This means they would work 48 hours against a 42-hour contract.
Last week hours — hours worked in the previous week for context.
Status badge — Available (green) means no conflicts. Has Shift (red) means they already have a shift on that day that conflicts with this one.
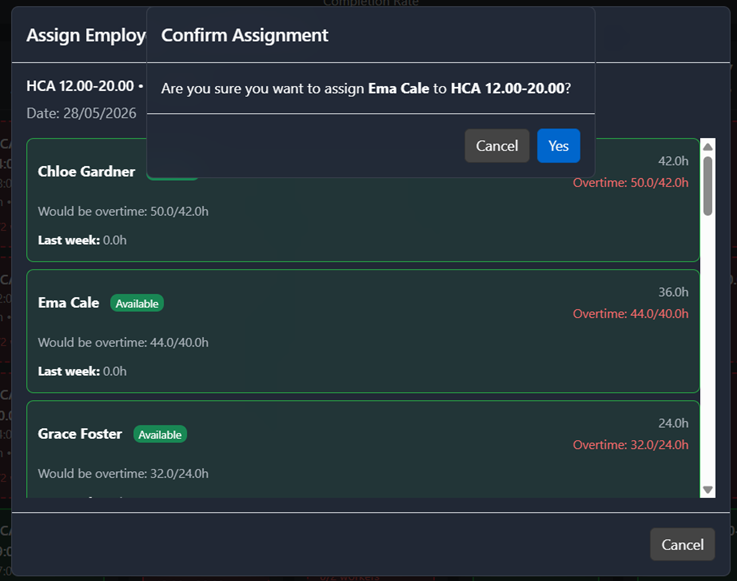
You are free to assign an employee even if it results in overtime — the system will allow it but clearly highlights the overtime for your review.
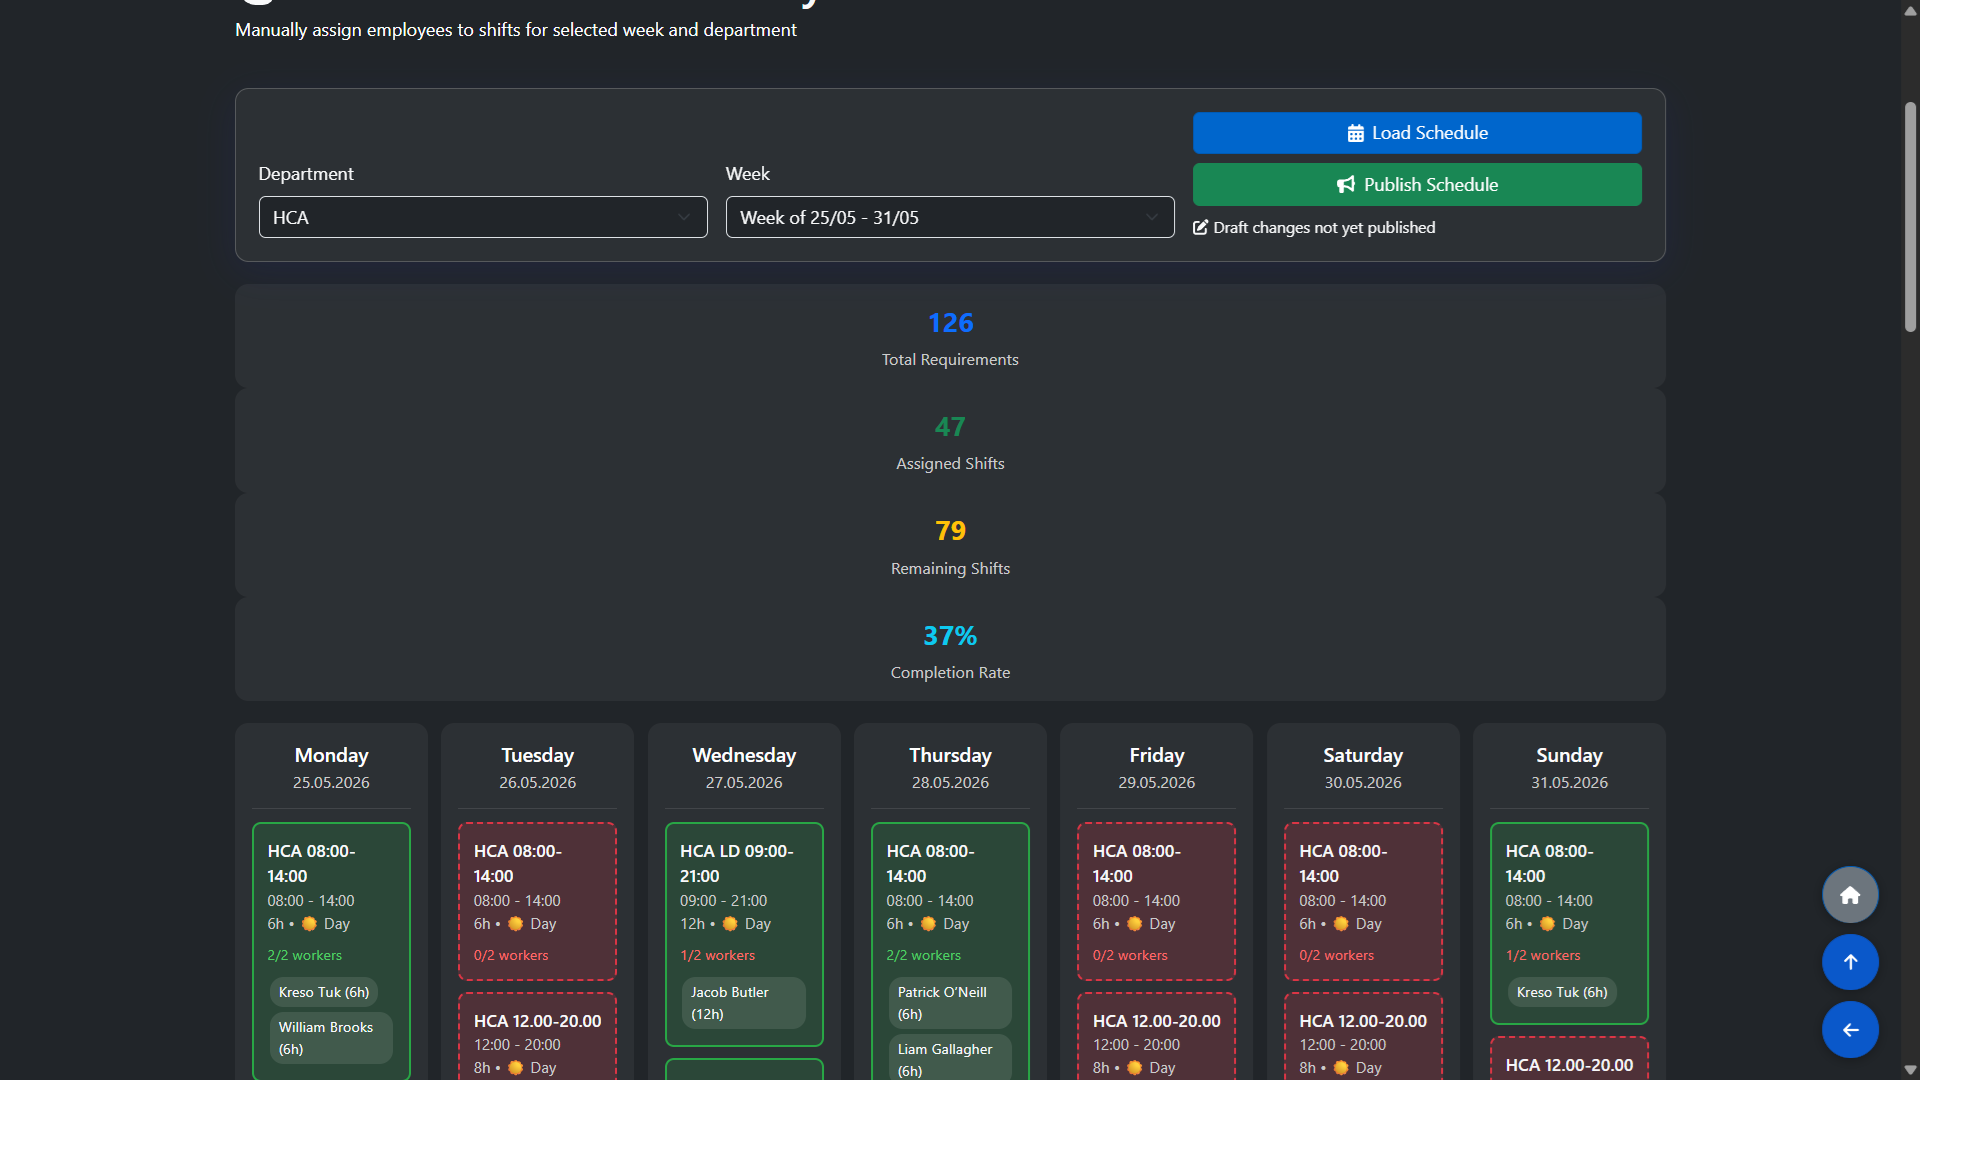
Monitoring the Completion Rate
In the top section of the page you can see a live summary of your scheduling progress:
Total Requirements — the total number of shift slots that need to be filled this week.
Assigned Shifts — how many slots have been filled so far.
Remaining Shifts — how many are still open.
Completion Rate — shown as a percentage. When this reaches 100%, all shifts are fully covered.

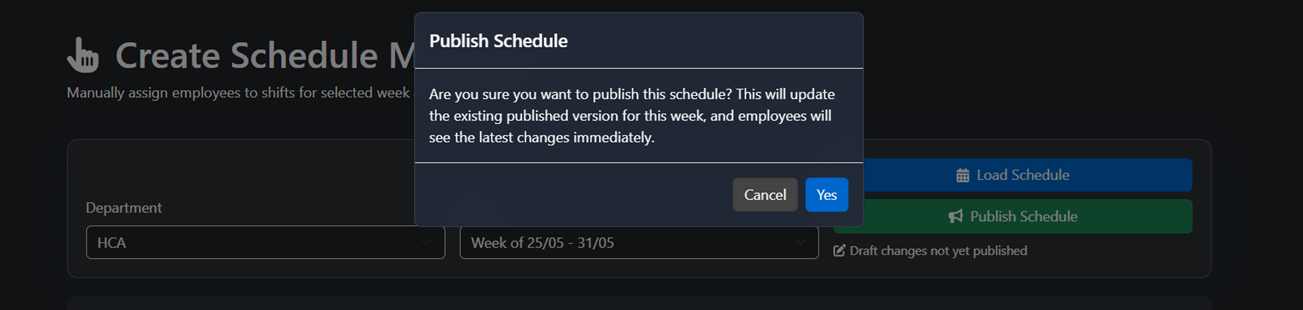
Publishing the Schedule
Once you are satisfied with the schedule, click the Publish button. Publishing makes the schedule visible to all staff members in that department for the selected week.
Important: You do not have to use the auto-scheduler at all — the entire schedule can be built manually from scratch using this grid. The auto-scheduler is simply a tool that generates a starting point (a skeleton schedule) based on your requirements, which you can then adjust manually.
Please be aware that if you run the auto-scheduler at any point, it will delete the current schedule for that department and week and replace it with a freshly generated one. Any manual changes you have made will be lost. Only run the auto-scheduler if you are happy to start over from a new default schedule.